Authentication
Configure NextAuth.js for authentication in your application.
Auth secret
Auth secret is used to encrypt the NextAuth.js JWT, and to hash email verification tokens. This is the default value for the secret option in NextAuth and Middleware.
Generate a secure random string for your NextAuth secret. You can use the following command:
openssl rand -base64 32Auth URL
The auth URL is the canonical URL of your website. If your Next.js application uses a custom base path, then it is the route to the API endpoint in full.
http://localhost:3000 (local)
https://yourdomain.com (production)
Add to local env
Add the following to your .env file:
NEXTAUTH_SECRET=your-generated-secret-key-here
NEXTAUTH_URL=http://localhost:3000
NEXT_PUBLIC_APP_URL=http://localhost:3000
NEXT_PUBLIC_APP_NAME=My App
Add to production env
Add the following to your .env.production file:
NEXTAUTH_SECRET=your-production-generated-secret-key-here
NEXTAUTH_URL=https://yourdomain.com
NEXT_PUBLIC_APP_URL=https://yourdomain.com
NEXT_PUBLIC_APP_NAME=My App
Google OAuth
Prerequisite: You need to have a Google account.
Configure Google OAuth to enable sign-in and sign-up buttons with Google in your application.
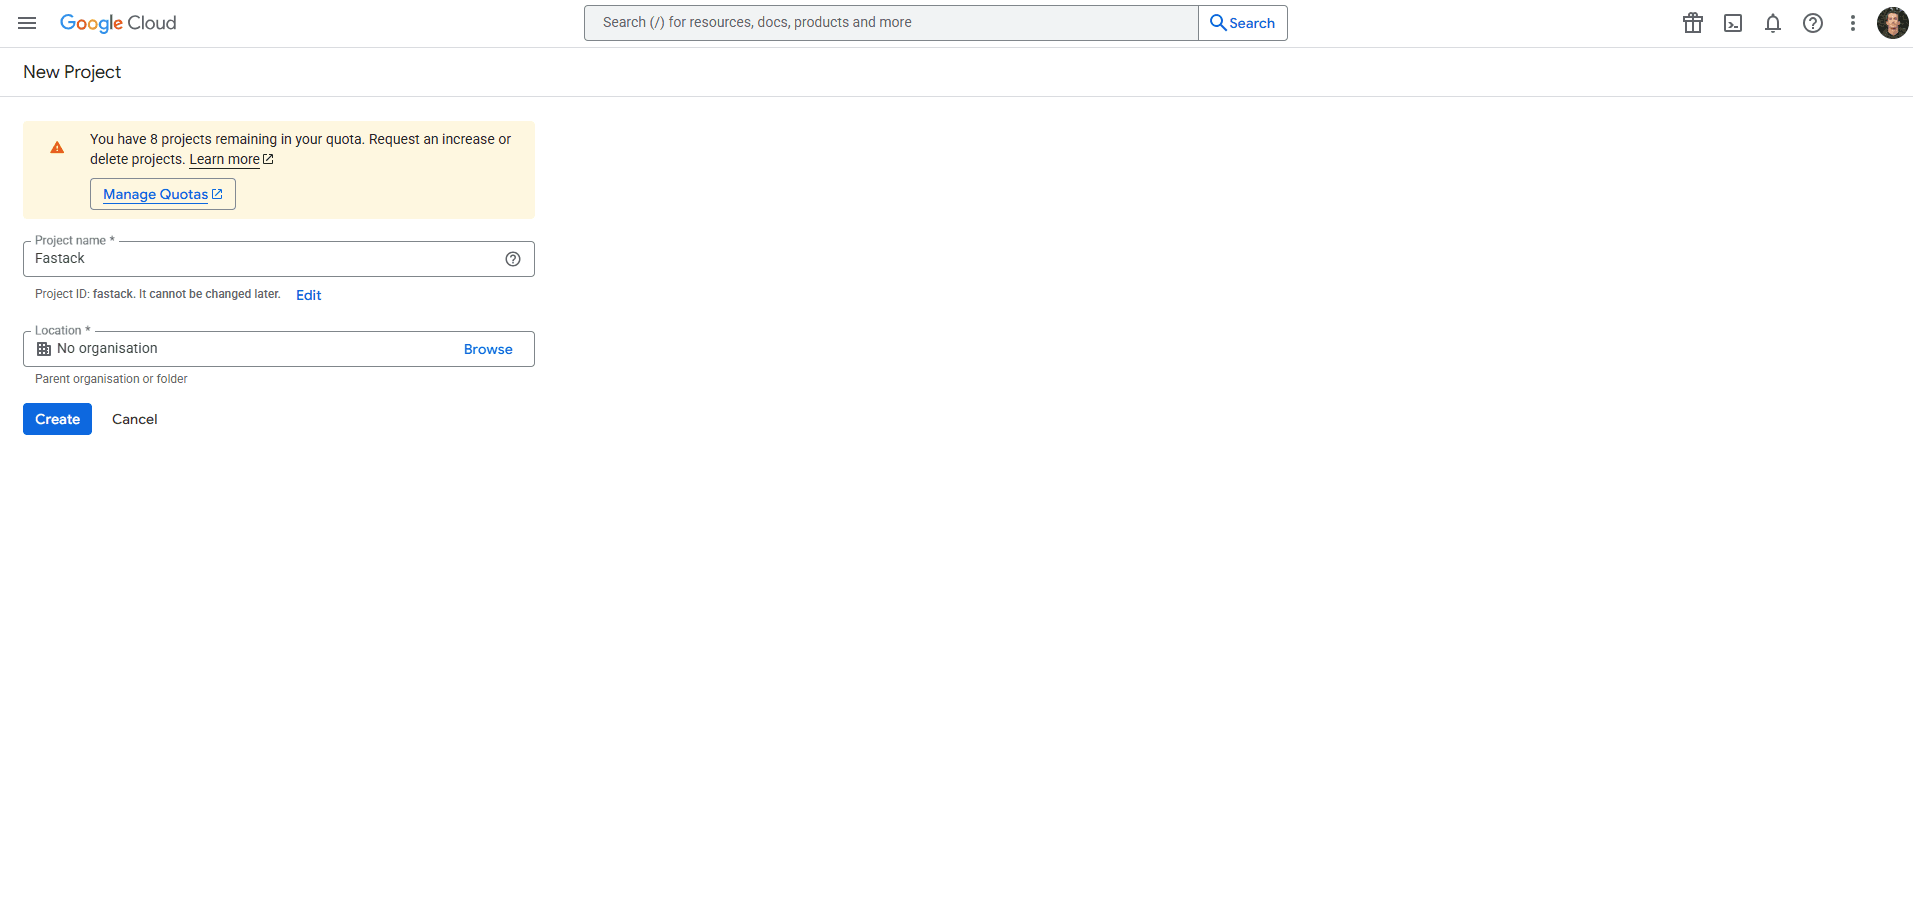
Navigate to APIs & Services > Library and enable Google+ API.
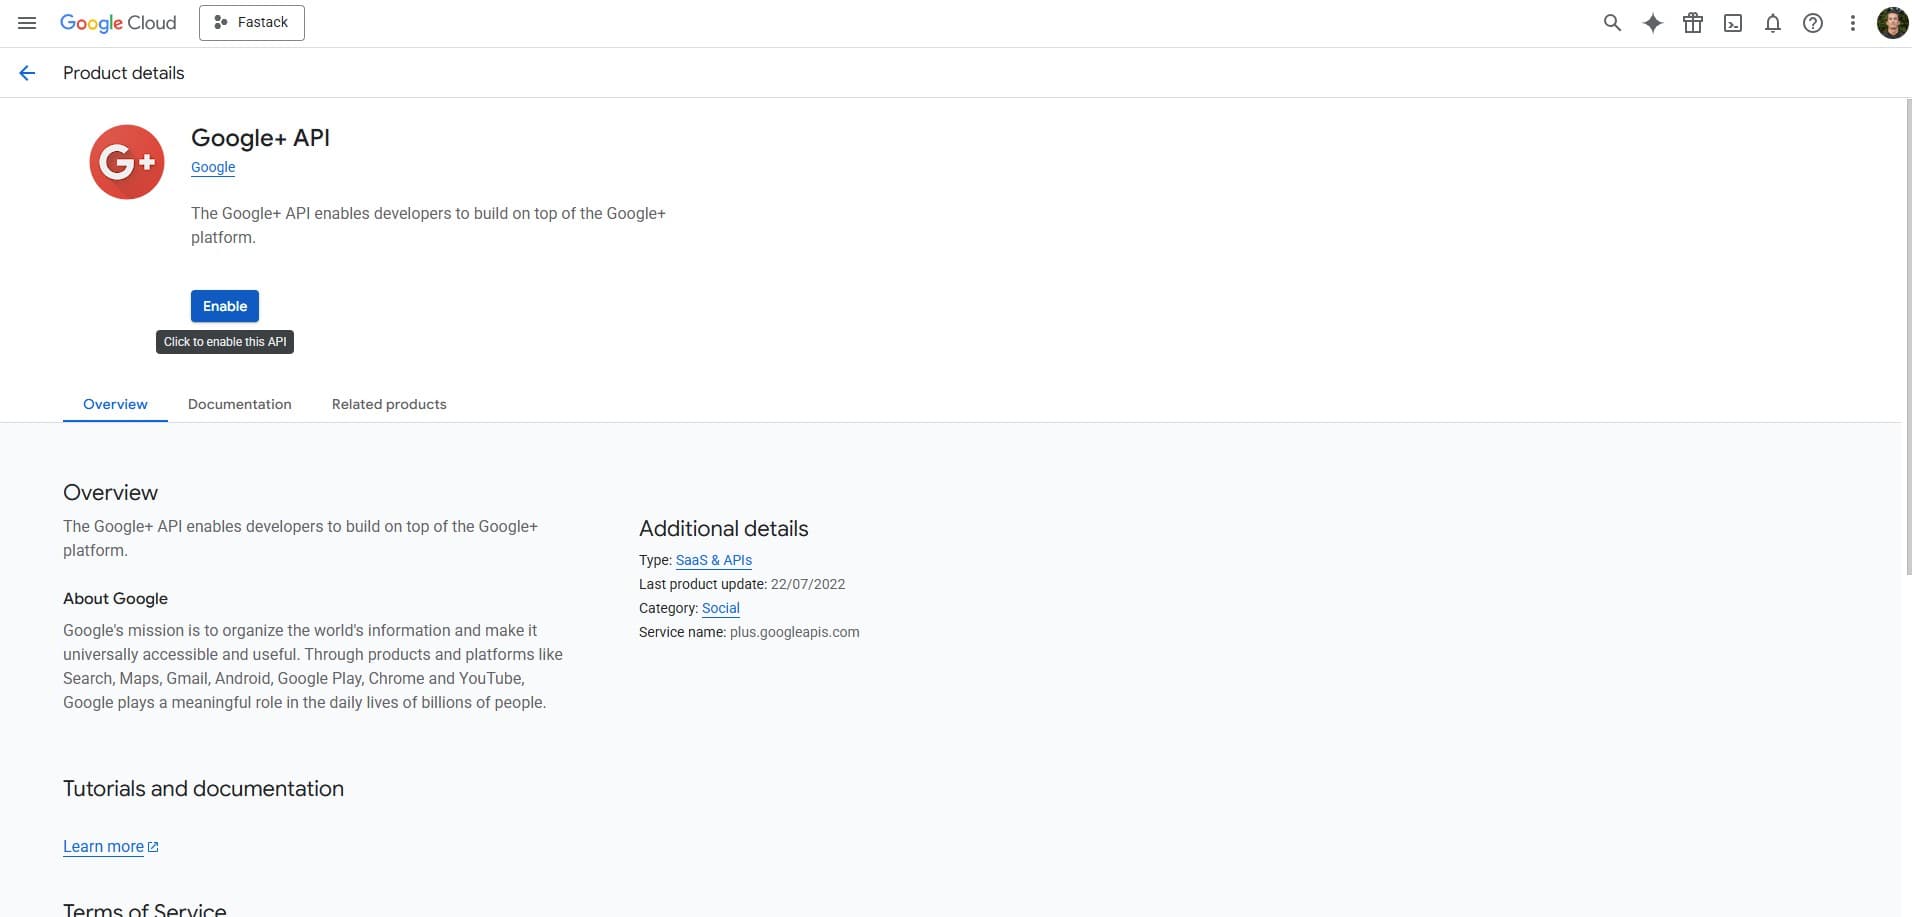
Configure consent screen
Create a new branding with your app information.
Enter your app details and select audience as external.
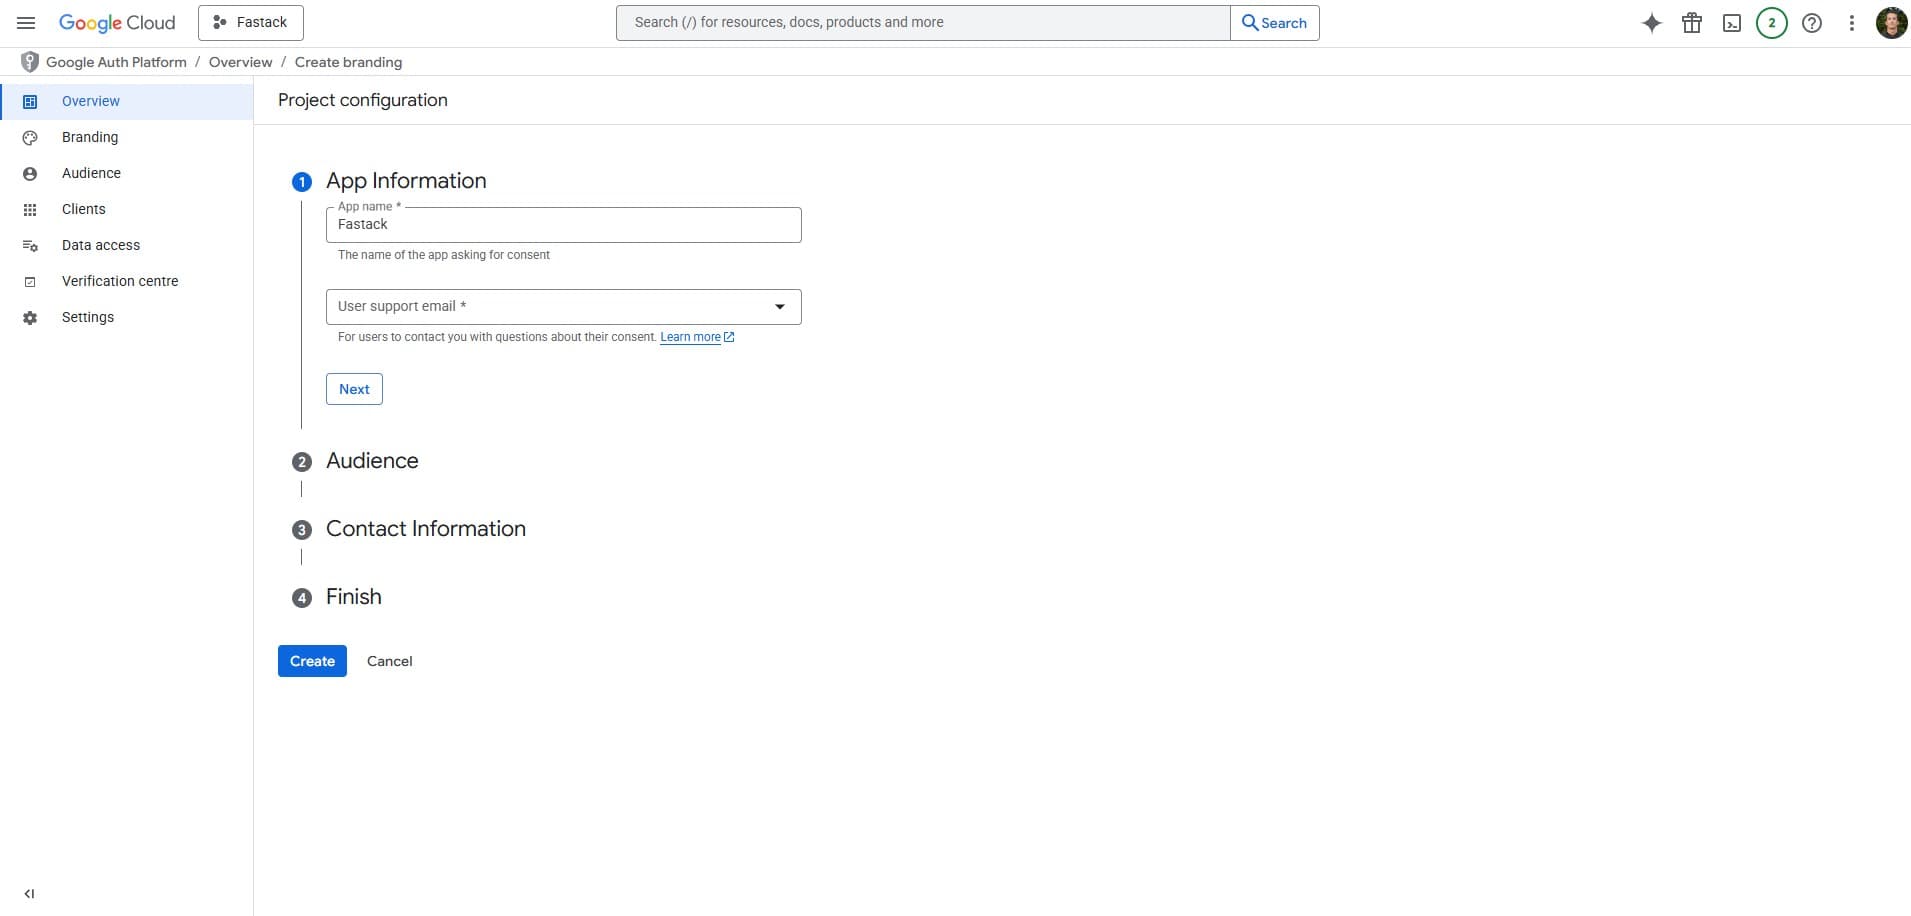
Configure branding
Go to branding to add branding information:
- Add a logo
- Add application home page:
https://yourdomain.com - Add privacy policy link:
https://yourdomain.com/privacy-policy - Add terms-of-service link:
https://yourdomain.com/terms-of-service - Add authorized domain:
yourdomain.com
Create credentials
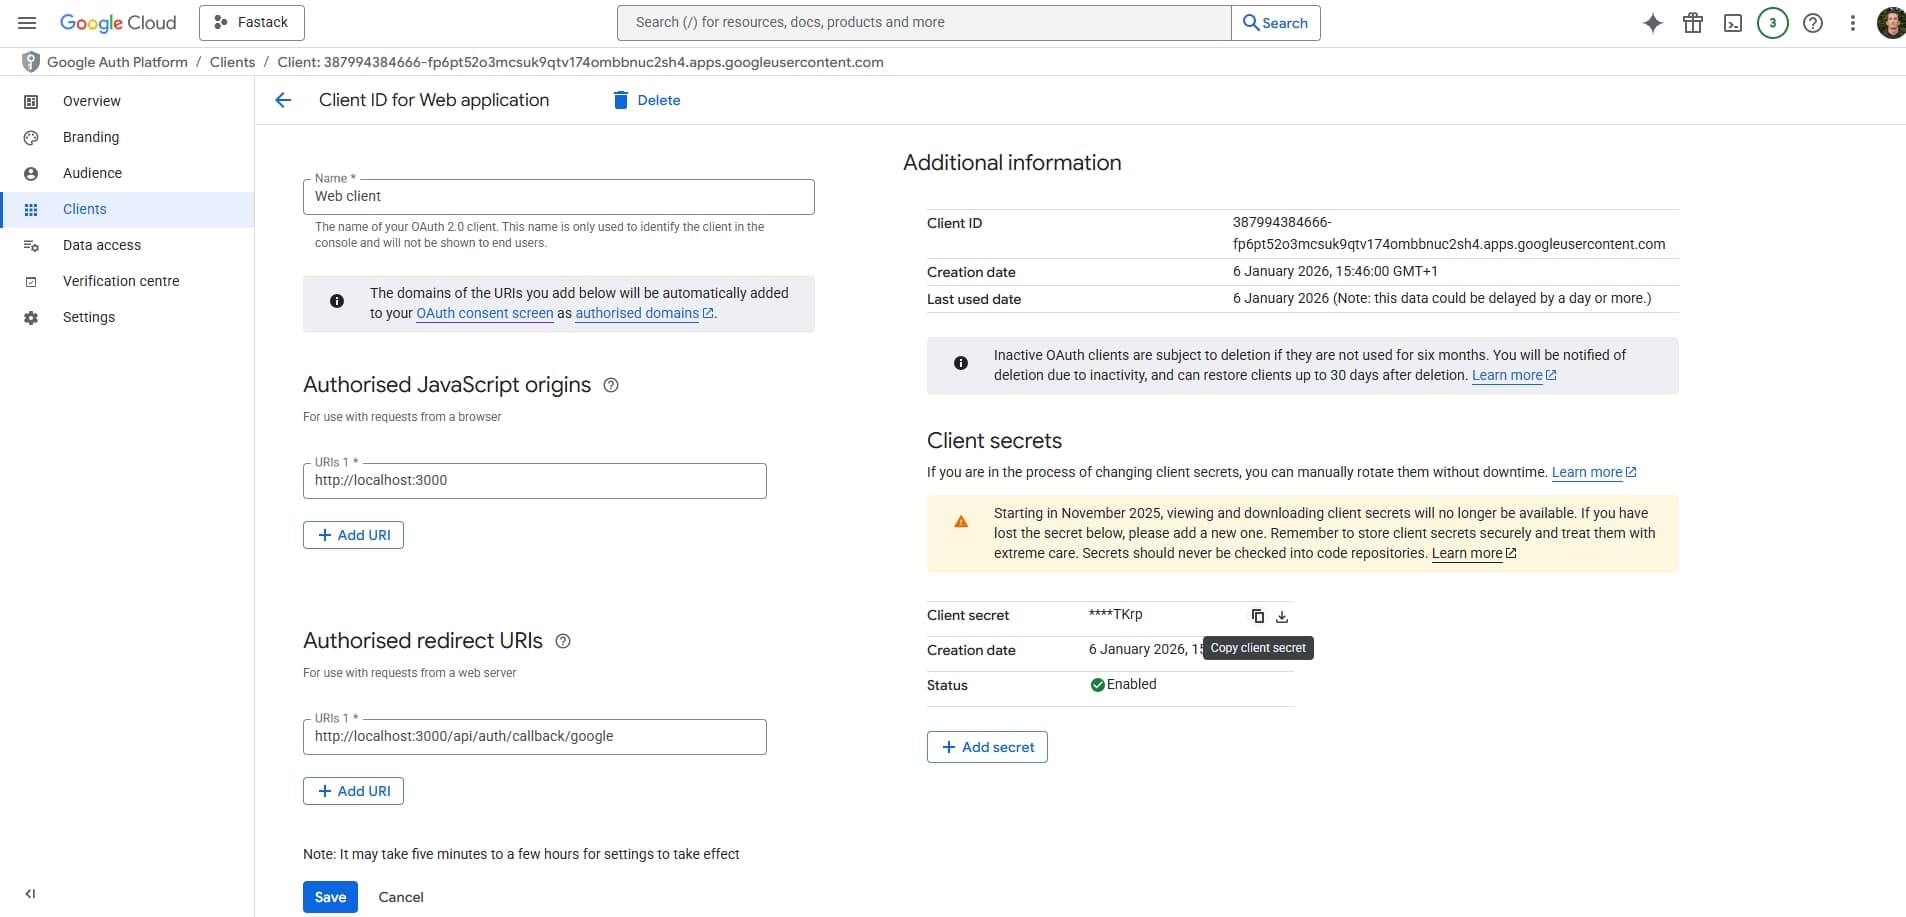
Go back to APIs & Services > Credentials and create new credentials by clicking 'Create Credentials' > 'OAuth client ID'.
Select "Web application"
Add authorised origins:
http://localhost:3000
https://yourdomain.com
Add authorised redirect URIs:
http://localhost:3000/api/auth/callback/google
https://yourdomain.com/api/auth/callback/google
After creating the OAuth client, copy the client ID and client secret.
Add to local env
Add the following to your .env file:
NEXT_PUBLIC_GOOGLE_CLIENT_ID=123456789-abcdefghijklmnop.apps.googleusercontent.com
GOOGLE_CLIENT_SECRET=GOCSPX-xxxxxxxxxxxxxxxxxxxxx
Publish app
Go to Audience and click "Publish app".
Verify branding
Prerequisite: Your project must be deployed to production on the domain and the pages /privacy-policy and /terms-of-use should be accessible.
Go back to branding and click "Verify branding".
Add to production env
Add the following to your .env.production file:
NEXT_PUBLIC_GOOGLE_CLIENT_ID=123456789-abcdefghijklmnop.apps.googleusercontent.com
GOOGLE_CLIENT_SECRET=GOCSPX-xxxxxxxxxxxxxxxxxxxxx
GitHub OAuth
Prerequisite: You need to have a GitHub account.
Configure GitHub OAuth to enable sign-in and sign-up buttons with GitHub in your application.
Configure local app
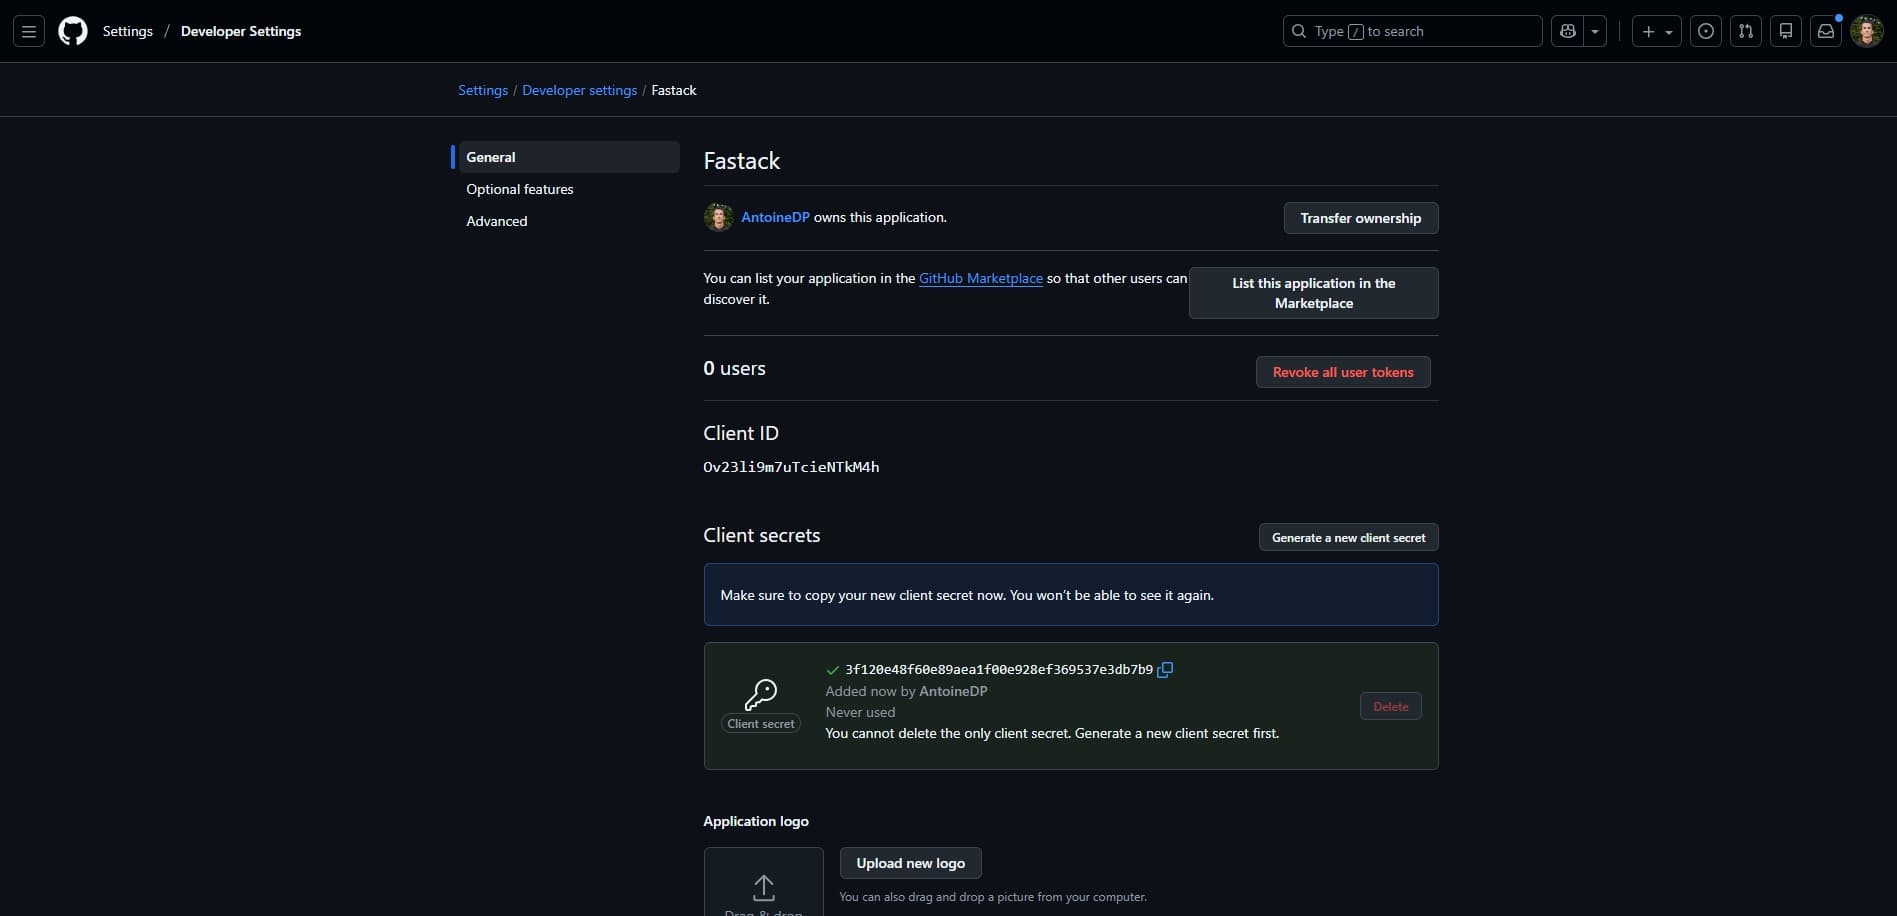
Go to GitHub Settings > Developer settings > OAuth Apps and create a new OAuth app.
Fill in homepage URL:
http://localhost:3000Fill in authorization callback URL:
http://localhost:3000/api/auth/callback/githubAfter creating the OAuth client, copy the client ID and client secret.
Add to local env
Add the following to your .env file:
NEXT_PUBLIC_GITHUB_CLIENT_ID=Ovxxxxxxxxxxxxxxxxxx
GITHUB_CLIENT_SECRET=xxxxxxxxxxxxxxxxxxxxxxxxxxxxxxxxxxxxxxxx
Configure production app
Go to GitHub Settings > Developer settings > OAuth Apps and create a new OAuth app.
Fill in homepage URL:
https://yourdomain.comFill in authorization callback URL:
https://yourdomain.com/api/auth/callback/githubAfter creating the OAuth client, copy the client ID and client secret.
Add to production env
Add the following to your .env.production file:
NEXT_PUBLIC_GITHUB_CLIENT_ID=Ovxxxxxxxxxxxxxxxxxx
GITHUB_CLIENT_SECRET=xxxxxxxxxxxxxxxxxxxxxxxxxxxxxxxxxxxxxxxx